Filed under: Budget Meals, Soup | Tags: autumn soup, easy soup, pumpkin soup, roasting pumpkin, vegan option

We never ate fresh pumpkin growing up. We carved them. We ate zucchini, butternut, and countless other varieties of squash, but then would head off to the store and purchase pumpkin puree in a can to make our holiday pumpkin pie.
I had no idea how easy it was to cook pumpkin. I have to admit that I learned this from Martha Stewart years ago and I have not gone a season without cooking up lots of pumpkins and storing the puree in the freezer to use in various ways all winter long.
Okay, are you ready for how easy it is to roast a pumpkin…

1. Stick the entire pumpkin on a foil lined baking sheet. Yes, the entire pumpkin! No cutting, nothing!
2. Put in a 350F oven for about an hour or until pumpkin starting to soften and brown up. It will be soft to the touch when done.
3. Let cool completely.
4. Pull off skin. Discard seeds and stringy stuff.
5. Store cooked pumpkin in quart freezer bags.
Can be used in soup, pie, ravioli, etc. So many choices.
Now, let’s get on with pumpkin soup…
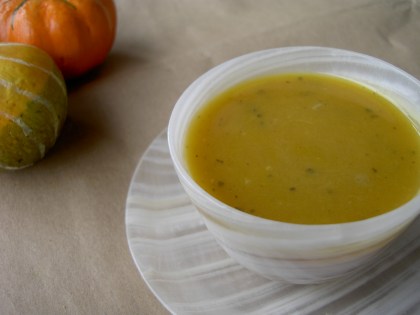
The ingredients are few, but you do not need much with fresh pumpkin. It simply tastes fabulous.
2 T. olive oil
2 cloves garlic, finely chopped
2 t. sage
1lb. pumpkin puree
3-4 cups chicken/ vegetable stock
2-3 T. butter
salt and pepper to taste
1. In soup pot, heat oil over med heat.
2. Add garlic and sage to oil and stir. Let get warm and garlic soften a bit.
3. Add pumpkin puree, stir. Then add 3 cups of stock.
4. I use a hand blender to blend the puree and stock together, but you can also use a stand blender. Add more stock to get the consistency that I want. Add butter one tablespoon at a time until the texture is smoother.
5. Taste, then adjust salt and pepper.
6. Heat through and serve.
Homemade soup is pure food of love. A warm cozy bowl of goodness. It is healthy and something my home always has some variety of it during the winter.
Pull up a chair, Elizabeth
Filed under: Budget Meals, Main Entree, Soup, Vegan | Tags: budget friendly, comfort food, easy dinners, meatless, meatless mondays, soup, Vegan, vegetables

“Meatless Mondays!” An intiative with the goal to reduce meat consumption by 15% to improve personal health and the health of our planet. I just love the idea and found out that “Meatless Mondays” is not a new concept. It was first introduced to Americans during World War 1 by the US Food Adminstration, though is was reintroduced in 2003 for health, as a way to reduce the consumption of key staples to aid the war effort. “Meatless Mondays” and “Wheatless Wednesdays” were born. According to Meatless Mondays.com
The effect was overwhelming. Some 10 million families, 7,000 hotels and nearly 425,000 food dealers pledged to observe national meatless days. In November 1917, New York City hotels saved some 116 tons of meat over the course of just one week. According to a 1929 Saturday Evening Post article, “Americans began to look seriously into the question of what and how much they were eating. Lots of people discovered for the first time that they could eat less and feel no worse – frequently for the better”.
Now do not get me wrong, I have said often the I am unapologetic carnivore, but working towards better health and safer planet is really a no-brainer. I make an effort to know where my meat comes from and I no longer desire to have an entire side of beef at one sitting to feel satisfaction. So we, as a family, decided to start not having any meat one day a week. No beef, chicken, pork or fish, so when you have a son that is allergic to dairy and eggs its more like vegan Mondays.
Okay, I was a little scared about doing this, but it has turned out surprisingly well. I have never allowed my child to eat something different then what the adults are eating unless is has to do with his allergies. I am not a short order cook to meet his every whim when it comes to food. I also believe that this really helps with the ability to try new things in many aspects of life. Have you ever know a super picky eater that loves to travel and explore new things? Gabriel know that what is served is what he gets for dinner or he doesn’t eat that evening. That being said, I do try to find things that he will find pleasurable. Soup is my best vehicle for going meatless for my six-year-old. He loves soup.
Super fast, super tasty, super healthy is Greens and Potato Soup. My six-year-old actually ate two bowls full.
Serves 2-4
Kale, one big bunch
3 medium potatoes, peeled & cut into chucks
1 large leek, thinly sliced
2 gloves of garlic
3-4 cups chicken or vegetable stock
2 big handfuls washed spinach
fresh dill or other herbs that you have on hand.
few pinches hot pepper flakes
salt and pepper to taste
Finish with purple onion,olive oil, and peashoots.
1. Put a pot of salted water on to boil.
2. Remove heavy thick stems from kale and slice up.
3. Place kale in boiling water for about ten minutes. Take a test bite of the kale and make sure that it is tender. When tender, drain.
4. In second sauce pan, place potatoes, leeks, and garlic with broth. Put enough broth in to cover the potatoes. Bring to a boil. Cook until tender.
5. Use a potato masher to mash-up the potatoes in the broth.
6. Add cooked kale, spinach, herbs, and seasonings.
7. Add more broth if necessary, then heat through.
8. Taste and adjust seasonings.
9. Serve and garnish as desired. Today I garnished with purple onions, a drizzle of olive oil (would have loved pumpkin seed oil, but I can not find it), and a few sweet pea shoots.
Note: a. You can make this super thick or soupy. I have made it thick like mashed potatoes as well. Just use less broth.
b. You can also mix up your greens. Use whatever ones you have on hand.
c. I have also added curry powder to this soup as well for a different flavor sensation.
Think about Meatless Mondays you and your family. When you join me and my family on Mondays at my communal table you will find us enjoying the bounty of vegetables and grains. I seem to make a new recipe every week to learn more and more about how to cook this way. I would love to hear about your favorite Meatless meals.
Pull up a chair, Elizabeth
Filed under: Budget Meals, Main Entree | Tags: budget friendly, comfort food, cornish pasties, meat pie, pasties, pasty, root vegetables, savory pies

My family has deep roots in Northern Michigan and its rich mining tradition. The Pasty was a traditional savory meat pie that was cooked in the morning, wrapped up and placed in a tin, so that lunch would be warm for the miners. Initials that were placed in the pies crust were to tell the difference among the different mens pasties and the thick crust edges were so the miners dirty hands had a place to grab without getting their lunch covered with soot.
I have always had it served with ketchup, but in Quebec they serve it covered with brown gravy.The blend of beef and pork with sweetness of the rutabega really make this perfect rich fall dish. This is my kind of comfort food.
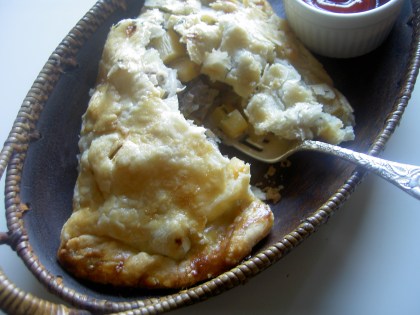
I often make it in classic pie form with two crusts.Today I made it in traditional form, but I have made them the size of a twinkie as well. The possibilities are endless. It is great to take for a potluck or tailgating. I usually serve a green salad with a tart vinaigrette to compliment this savory meat pie.
My mother remembers her gramma cutting a large amount of lard into flour and placing it into a huge crockery that went in the cellar. My grandmother would walk to the cellar in the morning to gather all the things that need to cook that day and would take a bowl with her. She knew exactly how many handfuls of the lard filled flour she need for what she was making that day. In the end, there seems to nothing flakier then a lard crust and my son is allergic to dairy, so lard it is.

Serves 4
Gramma Schuler’s Pasties:
1/2 pound small diced sirloin
1/2 pound small diced pork steak
1 cup russet potato, peeled and small diced
1 cup rutabega, peeled and small diced
1 cup onion, finely diced
2 tablespoons fresh parsley, finely chopped
1 tablespoon flour
2 tablespoons butter
salt and pepper, to taste, be generous
1.Preheat oven to 400F.
2. Prepare Gramma’s Pie Crust in the quality you desire. Cover and let rest.
*Note: see crust recipe to see the correct quantity. Depending if you make your pasty in individual pies or in traditional pie form.
3. Mix all the ingredients in mixing bowl.
4. Roll out crust. Fill with meat mixture. Dab mixture with butter. Fold over top crust. Vent.
5. Bake for 30-40 minutes or until golden brown.
Gramma’s Pie Crust:
1/3 cup lard
1 tablespoon butter
1 cup flour
1/2 teaspoon salt
1/8 cup ice cold water
1. These ingredients make one nine-inch pie shell. If you are making a traditional pie, double the ingredients. If you are making four individual pies, triple the ingredients.
2. Sift the flour and salt together in a large bowl. Cut the lard and butter into the flour using a fork or cutter until the fat pieces are the size of peas.
3. Add water gradually, gently mixing with your hands until dough hold together. Do not overmix or the crust will be tough. Cover the dough with plastic wrap and chill before using.
Some of my earliest memories are how much I loved my grandmothers. My Gramma Schuler just shined. She loved her friends and was a fabulous cook. I just remember how much I felt loved by her. Here is to all the food memories that remind us of beautiful moments in our life. Here is to the food memories that teach us how our ancestors lived and let us know just a little more about ourselves.
Pull up a chair, Elizabeth
Filed under: Budget Meals, Main Entree | Tags: budget friendly, comfort food, easy dinners, eco-friendly lunch boxes, how to use leftovers, lunch, pasta, school lunch, school lunch ideas
Gabriel is only given twenty minutes for lunch in first grade. What? Imagine standing in line for hot lunch ten of those twenty minutes. On top of it, imagine that is may be the only meal that I have all day and I have to inhale it in ten minutes. Of course, at this point, why would I care about its nutritional value. I just want to feel full. This scenario plays out everyday for hundreds of thousands students in the US. Now this thought strikes terror and deep sadness straight to my foodie heart.
I pack Gabe’s lunch everyday. We pack it all in a eco-friendly lunch box called Laptop Lunches. I highly recommend it. Super durable and we are now into our second year of using it with little wear and tear. I also have a bento thermos lunch kit that we use for hot pasta dishes or soup in the winter months.
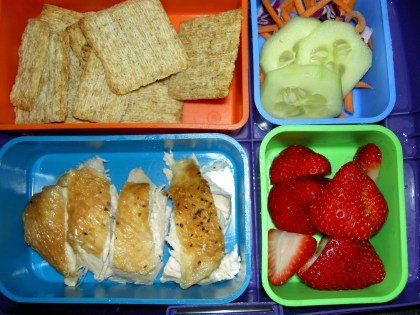
Roasted chicken from the evening before is the main part of this meal. Gabe loves crackers, so I will put them in his lunch instead of making a sandwich. Veggies and fruit round out our meal. Because of Gabe’s dairy allergy, we always pack rice milk.
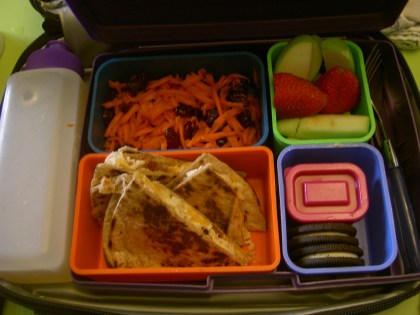
Chicken and soy cheese quesdilla on a whole wheat tortilla with BBQ sauce are on his main menu today. Grated carrot with raisins, lemon juice and touch of sugar for his salad. (This is so good!) I also use lemon juice on his cut apple. Special treat that day is having two Oreo’s in his lunch. Load with chemicals, but none of them that he is allergic to.

HLT aka Ham, Lettece, and Tomato sandwich on whole wheat roll. Oh, no, we ate the last piece of fruit for breakfast. Hey, I will make air popped popcorn in the microwave. No oils and huge amount of fiber make this one of our family favorites.
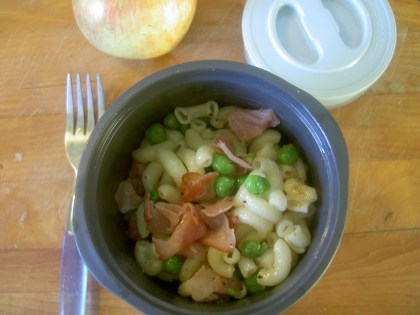
Gabe calls this “mac and tease” since he can not have cheese. Cooked pasta leftover heated up with some vegan butter, garlic, peas and ham. Seasoned with salt and pepper to taste. I make this the morning of and stick it in the thermos hot, so that it is warm still at lunch time. He gets well over a cup of pasta and veggies in this thermos. An apple rounds out the meal. He will eat this for breakfast as well, if I let him.
I love the thought that Gabriel is eating food he loves the moment that he opens his lunch box. He doesn’t even need to take the time out of his short lunch break to stand in line or to throw anything away.
Pull up a chair, Elizabeth
Filed under: Budget Meals, Main Entree, Vegan | Tags: budget friendly, cauliflower, cauliflower pasta sauce, comfort food, family meal, how to use leftovers, pasta, roasted cauliflower, Vegan
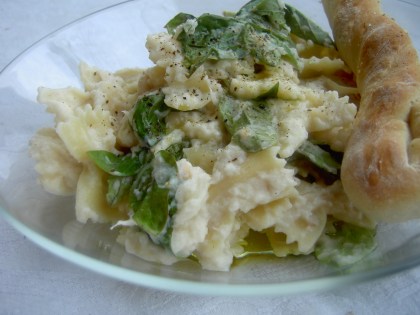
In my never ending search for the perfect comfort food that is low in fat and calories, I decided to make the much talked about whipped cauliflower. It is rumored that it would replace my cravings for the much more fat ladened mashed potatoes. I started out by roasting the cauliflower with garlic in the oven, then I blended in chicken stock with my emursion blender. There was not one sign of it even resembling my beloved mashed potatoes, but what emerged was a pasta sauce. Hey, the flavor was good… I started the pasta water to boil.
I have made this as a pasta sauce over and over again. Super creamy, super satisfying, and has become a comfort food for my son. With his allergy to dairy, I realized that Gabriel had not had much of that creamy texture pasta comfort that good plate of mac and cheese would give you. This has become his mac and cheese and I have some gratification that I have figured out a beautiful healthy comfort food that my son is going to carry with him through his life. Maybe he will tell the story of the disaster that turned into his favorite pasta recipe to his children. Okay, okay, I am a total sap. Get used to it!

Serves 6
1 head of cauliflower, seperated into florets
3-5 gloves of garlic, smashed
3-4 T. olive oil
fresh thyme sprigs, 3 or 4
3-4 cups chicken stock
2-4 T butter, I use Earth balance, which is vegan friendly
1 lb. pasta, traditional or whole wheat works great
1 15 oz can of butter beans, drained
big handful of fresh basil
salt and pepper to taste
1. Place cauliflower florets on baking sheet with the smashed up cloves of garlic.
2. Coat with olive oil, sprinkle with salt and pepper. Throw the sprigs of thyme on a baking sheet then toss all the ingredients together, making sure everything is coated with the oil.
3. Place in preheated oven at 400F for about twenty minutes. You will know it is done when the cauliflower is roasted a light brown and cooked through. Remember, brown adds flavor.
4. Place everything from the baking sheet into a large sauce pan or blender, except the wood of the thyme springs. Pop the garlic out of its peels, then add.
5. Add some chicken broth and start emulsion blender or stand blender slowly. Keep adding chicken broth until you get a smooth consistency. I throw in some butter to blend into the sauce to give it a nice finish.
6. If you are using a blender, put the sauce in a sauce pan to keep heated. Adjust flavors with salt and pepper. Taste, adjust. Taste always while cooking.
7. Start your pasta water boiling. Drop pasta in water when ready. Cook through.
8. Place drained beans into sauce. Heat through in pasta sauce.
9. Add drained pasta to sauce. Throw in hand fulls of fresh basil. Toss.
10. When I plate it, I drizzle some very virgin olive oil on the top.
I have made this ahead of time and put in a lightly greased baking dish, then topped with cracker crumbs and baked as a casserole. I have added tomatoes and spinach in it. I have grated cheese on it when I served it or just added it to casserole.
So for leftovers…

I love to add a few things to leftovers to make them different. I added red peppers (from a jar), chopped purple onion, peapods, capers, drained tuna, and a tablespoon of mayo to the cold pasta and you have a delicious tuna pasta salad for lunch.
By the way, I still think mashed potato is perfect comfort food and there really is no subsitute.
Pull up a chair, Elizabeth
Filed under: Budget Meals, Main Entree | Tags: anchovy, budget friendly, corn, fresh corn, risotto, sage, summer vegetables

I used to make risotto with lots of cream and cheese, but with my son being allergic to dairy, I had to change it up. Risotto has the ability to absorb liquid then release starches while it is cooking, leaving the rice with a creamy texture without even using adding dairy. I do finish with butter, but in my case, I use a vegan butter called earth balance. I like the taste and it has no cholesterol . I feel quite satisfied just adding a little grated romano on top of the risotto at the end.
The creaminess of the risotto with the sweetness of the corn is a perfect foil for the crispy saltiness of bacon. Simply crumble on the top, but a really fun addition to the top of this dish is Anchovy Sage Leaf Bites. I learned about this recipe from an elderly client that would come in every Wednesday morning to get her hair done for her afternoon card game with the ladies. She as rail thin and didn’t eat much, but she would make these every week with a big pitcher of Martinis. Hilarious. These little explosion of salty flavor could be used a lot of different ways. They are just fun.
Serves 6
Corn Risotto:
6 cups chicken stock
3 tablespoons olive oil
1 medium onion, finely chopped
1 1/2 cup arborio rice
1/2 cup Chardonney
2 ears of fresh corn, cut from cob
3 tablespoons butter
3 tablespoons fresh sage, chopped
salt and pepper, to taste
4 strips of bacon, cooked crispy, chopped
Romano cheese, grated
1. Bring chicken stock to boil in saucepan and keep simmering while cooking risotto.
2. In another sauce pan, heat up olive oil over medium high heat. Add onions until translucent.
3. Add rice and stir until opaque. About 1 minute. Add wine to rice, stir until absorbed.
4. Add chicken broth one ladle at a time. After each ladle is absorbed, add another. Stir constantly. I prefer to have the rest of the bottle of Chardonnay next to me, keeping my wine glass filled during my risotto stirring. My favorite way to make risotto.
5. When you have about 1 cup of chicken stock left, add remaining stock, corn, and sage.
6. When absorbed, finished with butter, salt, and pepper. Add cheese if you please Note: be careful with salt, if you are going to add bacon, cheese, and/or sage bites.
7. Serve and garnish with bacon and Anchovy Sage Bite for fun.
Anchovy Sage Bite:
sage leaf
anchovy
rice flour
pepper
1 egg, slightly beaten
canola oil
1. Mash anchovies in dish. Approx. 1/2 anchovy per sage leaf. You can make one or a dozen. Spread on one side of leaf.
2. Roll leaf in rice flour with pepper. Shake off excess.
3. Dip leaf in beaten egg.
4. Place egged leaf in canola oil that has been heating in a sauce pan.
5. Brown, drain and serve. I like to use them for garnish.
I love how risotto can showcase a summer vegetable off perfectly. You can make it healthy and budget friendly. My son feels super special being served a beautiful plate of risotto with extra handful of bacon. Hope that risotto can make it ways to your table.
Pull up a chair, Elizabeth
Filed under: Budget Meals, Main Entree, Sandwich | Tags: asian influenced, budget friendly, how to use leftovers, meatballs, melting pot meatballs, oxtail ragu

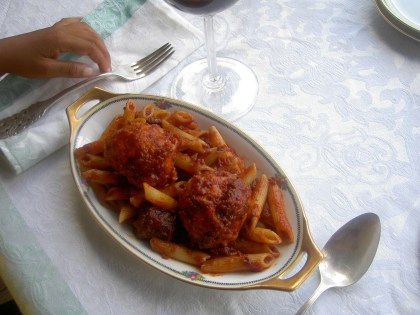
Meatballs, meatballs, meatballs. Love them. Who doesn’t love them? Whether it is a swedish meatball, pork meatball slow cooked in ragu, or a chicken meatball floating in a beautiful broth, meatballs are just solid comfort food. My families’ century old restaurant still has BBQ meatballs on the menu after decades of being a customer favorite. I suspect that there might even be a revolt if it were ever to be removed. I am telling you it is comfort on a plate.There is even a restaurant devoted to them in NYC. Who can resist a unctuous meatball sitting in front of them? The good news is that meatballs are not complicated and you can make them in a huge batch and freeze them to use in different ways at a latter date.
I originally dream up these meatballs to go with the large amount of Oxtail Ragu that I had frozen in the freezer. I tried to mimic the flavors of the ragu by adding some of the same ingredients to the meatball. A chef would say he is layering the flavors to add intensity. I usually bake my meatballs, but they taste great fried as well, but it is a healthier choice to bake them.
Makes 24
Melting Pot Meatball:
1 cup milk
1/3 cup raisins
1 cup bread crumbs
1 pound ground veal
1 pound ground pork
2 eggs
3 tablespoons tomato paste
1 small onion, finely chopped
3 cloves garlic, finely chopped
2 tablespoons grated romano cheese
2 teaspoons fresh oregano
2 teaspoons fresh sage
1 teaspoon creole seasoning
salt & pepper, to taste
1. Heat up milk until it just starts to bubble.
2. Pour over bread and raisins. (Note: It can be a couple slices of bread or bread crumbs. Whatever you have on hand.) Make sure that all the raisins are covered. Set aside to cool, while prepping your meat.
3. In a large shallow bowl, place the meat and all the rest of the ingredients in the bowl. Mix together.
4. Mix the milk mixture now that it has cooled. Raisins should be plumped up and milk soaked up in the bread. Add to meat mixture and blend well.
5. Form into balls. Size can vary depending on personal preference. I like them about the size of a plum.
6. Place on a ungreased cookie sheet and bake for about 30 minutes in a 350F oven. (I like baking my meatballs. Easy clean up, browns from oven. Brown adds flavor. Can freeze them and vary the sauce to suit the dish I am cooking at the time.)

Now for the explaination of “Melting Pot Meatball”… A couple of days have passed and longing for comfort food, but more ragu and meatballs are not going to hit the spot. No way am I going to the grocery store at this hour. Oh yes, I can change the sauce that I put over the meatball and satisfy my need for something different. Asian influenced..yeah, that’s it. With some heat…yes.
So I pull meatballs out of the freezer and defrost in microwave. Start the sauce cooking, then toast the bread for my meatball sandwich. Oh, I have some dinner roll size ciabatas in the freezer, so it looks like I am going to have Meatball sliders. Oh, now I am getting hungry. Lettece, jalepenos and some pickled cabbage are placed on the bread for the base of the slider. I toss the meatballs in the finished sauce and place on top of the base. Top it and serve…OMG. I usually have the handy bottle of Sriracha on the dinner table for the people that want more heat. I am one of those people. Love spicy heat.
Tangy Asian sauce:
1/2 cup hoisin sauce
3 tablespoons soy sauce
1 tablespoon rice vinegar
3 tablespoons water
3 ginger, large slices
2 scallions
3 slices jalapeno
3 garlic cloves
1/2 teaspoon sriracha
1 teaspoon sesame oil
1.Place all the ingredients in a sauce pan and heat over low heat until cooked down slightly. Approx. 15-20 minutes.
2.Strain sauce through sieve. Use on meats or veggies. Will store well in fridge for about 10 days.
Hope that you can see how you can stretch your food dollars and your time with a little prep and forethought. I got several meals out of few recipes. Plus, meatballs are just the best.
Pull up a chair, Elizabeth
Filed under: Budget Meals, Main Entree | Tags: budget meal, feeds a crowd, italian ragu, oxtail, oxtail ragu, sauce
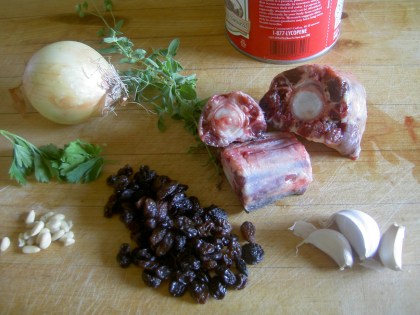
I can hear it now…”Oxtail, what? Are you serious? I would never cook a tail from a cow, let alone eat some of it.” Oxtail is something that I never had growing up and was not exposed to much, but in my travels I have been fortunate to have this succulent slow braised meat in several ways. Whether is it in soup in Asian or in a spicy sauce in Africa, I loved it.
So I was on a mission to make own oxtail recipe. First, I searched for a good price. Since there is only one tail per animal ,sometimes an oxtail can be a bit expensive. The bones add flavor to whatever sauce or broth you cook it in, but there is not a lot of meat. I have not seen them fresh anywhere, only frozen, but I found the best price and the best quality at my local market directly from the farmer. One tail cut up in about 2 inch pieces weighed about 2.6lbs.
I cooked the oxtails a long time in tomato sauce making a sumptuous sauce that I could use in several different ways. The red wine and raisins added another demension to the flavor level. You will be amazed at how easy it is to make this sauce. This recipe makes a large amount. I use a wide noodle for the sauce, then I usually put a piece of oxtail on top of the pasta. Sprinkling the top with some pine nuts and parsley give it another flavor component. The extra sauce is placed in freezer bags and used in different recipes later. Such as eggplant or lasagna.

Serves approx. 5 qts
1 oxtail, cut in 2 in. pieces, approx. 2.5lbs.
1/4 cup olive oil
1 large onion, finely chopped
5 gloves of garlic
3 26oz. tomato puree
2 cups red wine
1 cup raisins
1 tablespoon creole seasoning
bunches oregano & sage, fresh, tied up
salt & pepper, to taste
pine nuts, toasted
parsley, finely chopped
1.In stock pot, heat olive oil over med-high heat. Sear oxtails until brown.
2.Add onion, garlic, tomato puree, red wine and raisins. Turn down to a low burner.
3.Add creole seasoning and fresh oregano and sage. A little more oregano then sage in that bunch. Simmer for hours. I usually simmer for it about 3-4 hours. Stir occasionally.
4.Adjust seasoning with salt and pepper. Serve sauce with a wide noodle and I usually put one tail-piece on the plate as well. You will know when it is throughly cooked when the meat is easy to remove from the bone.
5.Top with pine nuts and parsley right before serving.
I hope that you take the time to experiment with different types of meat. It is so worth it. Let me know how it turns out.
Pull up a chair, Elizabeth
Filed under: Budget Meals, Main Entree | Tags: anthony bourdain, Bo Ssam, budget friendly, David Chang, Food52, Food52 editor's pick, Momofuku, mustard ginger sauce, pork shoulder
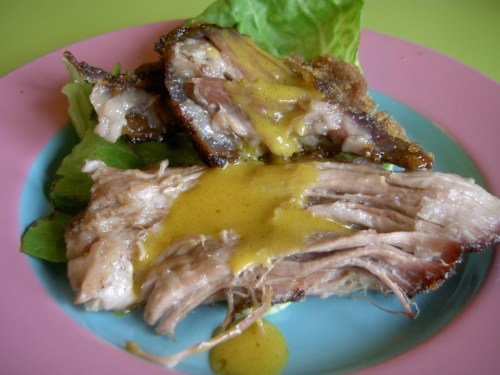
It’s a celebration! My Communal Table is one year old. Wow! I have sure enjoyed sharing food and memories. So gather your friends around the table and serve them pork shoulder. I do not know who doesn’t like this meal. When I first saw David Chang of Momofuku on No Reservations with Anthony Bourdain, I have dreamed of Bo Ssam.
So I, of course, went to the internet and found Working Class Foodies video rendition of making Chang’s Bo Ssam. It was so fun to find someone else that had dreamed of having the exact same meal, but the odds of me getting to New York soon were far from likely. I created the meal exactly like the video and it was great, but my mind, as I was serving it, was already tweaking it to make it more my own.
When Chang serves Bo Ssam in his restaurant he serves the entire pork shoulder right on the table and serves rice, kim chi, sauces and lettuce leaves right along side it. You take the lettuce leave as your base, like a taco shell, and you put on pork, rice, sauce and eat away. I love the idea of everyone digging in around the table making your taco the way you like it. You can add more vegetable dishes, like a mushrooms or eggplant, to satisfy that particular guest that likes veggies more than meat. I know it is hard to imagine, but there are some people like that. Cracking the crust of the pork with your tongs then pulling at a huge slab of tender pork get that hunk of pork is just pretty darn fun and fulfilling.

The great thing about serving this to quests is that it can all be made ahead of time and you are not doing much work. My other favorite part of this meal is that it is super affordable to feed a crowd. I keep going back to it time and time again. The meal just calls for everyone to let down their stress of the day and have some good food and conversation. My kind of meal.
My version uses Chinese five spice and I make a great tangy sauce to compliment the sweet pork. When I entered this recipe in Food 52’s recipe contest during the week of Your Best Roasted Pork Recipe, I received Editor’s pick. Which is approximately the top eight of over a hundred recipes. I have been fortunate to receive several editor’s picks, but getting to be one of the two finalist of a category as still alluded me. Feeling like a bit like Susan Lucci in her quest for the Emmy, I will keep trying and pushing myself to take better pictures and write better recipes.
The mustard ginger sauce is really great on a lot of things. I will keep well in fridge after you make it. My friend, Dave, told me that I needed to bottle and sell the stuff. You decide. It is great and easy to make.
Serves 4-6
Roasted Pork Shoulder:
4-5 pounds pork shoulder
1 cup sugar
1 cup salt
3-4 tablespoons Chinese five spice
1/4 cup brown sugar
1.Combine sugar and salt, then spread over entire pork shoulder.

2.Cover with foil and place in fridge for 8-12 hours.
3.Pull from fridge and rinse off all the salt and sugar.
4.Pat dry and rub Chinese five spice all over roast.
5.Place pork in roasting pan and stick in an oven set at 300F for approximately 5 hours.
6.Pull out of oven and turn up oven to 500F.
7.Rub roast with brown sugar and stick back in oven.
8.Pull out roast when the sugar gets crusty and melty.
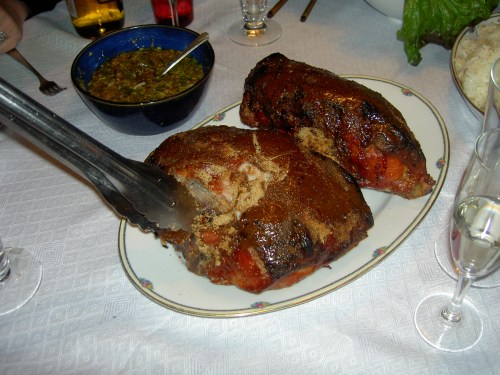
Mustard Ginger Sauce:
1/2 cup yellow mustard
1/2 cup apple cider vinegar
3-6 tablespoons honey
1 teaspoon sirracha
2 tablespoons ginger
2 gloves garlic
3 tablespoons water
2 tablespoons vegetable oil
1 teaspoon sesame oil
1.Place everything except the sesame oil in a small sauce pan.
2.Start out with 3 T. of honey. Add more to lessen the pucker of the sauce. It tastes a lot different next to the richness of the pork. I like it both ways. 2 T. of ginger = 2 inch piece of the root. I just slice the ginger when I put in the pot.
3.Simmer over low heat for approximately 20 minutes. Adjust seasonings.
4.Strain through sieve while pouring into a serving dish.
5.Whisk sesame oil in to sauce.
6.Serve warm or room temp with the pork, but is good cold later.
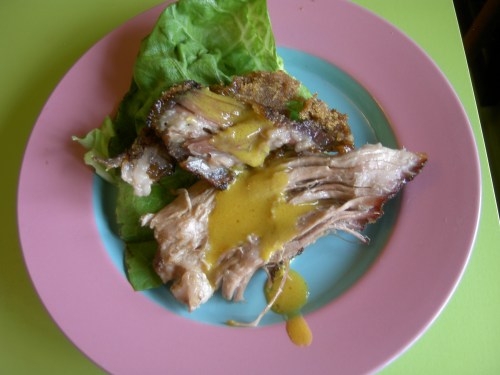
I just want thank everyone for all the support and ideas. I certainly have learned a great deal this last year about myself as well as more about cooking. I am so looking forward to year to come as my oldest son, Andrew, moves to Chicago to attend culinary school. My nieces and a nephew will also be here by then and will lead to much inspiration and cooking for the crew. My table is full and will be more bountiful this coming year. Join me on the journey.
Pull up a chair, Elizabeth
Filed under: Budget Meals, Main Entree | Tags: big star, easy dinners, quesadillas, rick bayless, tacos

Carmelized pineapple on a taco. Wow! This good idea came to me via Big Star, a new taqueria by powerhouse chef Paul Kahan. It is also fortunately right down the street from my son’s school. Ordering a few tacos and walking through Wicker Park munching is becoming our regular thing. Above is my inspired version of carmelized pineapple on a taco.
Truth be known, though, making tacos at home is even better and far more cost effective. We have tacos at least once a week in our household because they are real “fast food”. I make them on the run between school and t-ball practice in a huge variety of ways. We use leftover pot roast or pork shoulder. We use fish and seafood. Sometimes we use cheese, sometimes we don’t. They can have an Asian influence or classic Mexican, but always some heat.

I always start out with corn tortillas. They are just better for you and reality is that no self respecting Mexican would have a taco with a flour tortilla.
Heating corn tortilla tip: Two paper towels dampened with water, then wrapped around a small stack of corn tortillas and placed in the microwave for a minute.
Tacos on this night:
Steak: inexpensive cut, cut up and grilled with some adobe chili powder and garlic.
Yogurt: 0% Greek. (Instead of sour cream or Mexican creme. Like creme the best, but yogurt is better for you)
Cabbage: Finely chopped
Tomatillo Sauce: Store bought
Carmelized Pineapple: Pineapple cut up finely cooked down in oil, onion, salt, and pinch of adobe chili powder.
Lime
Cilantro
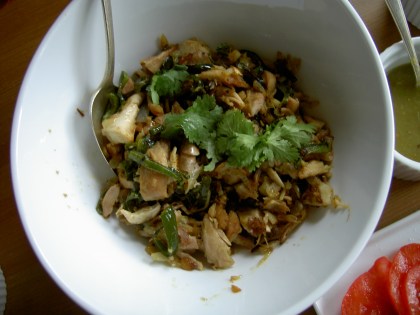
Another favorite filling: Using leftover rotisserie chicken heated up with poblano peppers, garlic, and onions. I try to let each person control the level of heat that they prefer, so I do not add much heat to the meat itself and use the sauces to introduce spice level.
I actually twittered Chef Rick Bayless on his advice when to introduce spice heat to children. He answered me back! He says to introduce it slowly and they will come to enjoy it.

Beer and margaritas are the perfect accompaniment with a taco, but it doesn’t work when I am on way to my son’s t-ball practice for a multitude of reasons. My go-to drink is iced green tea with a touch of pomegranate juice.

Sometimes Chicago’s own Top Chef Rick Bayless joins us for taco night.

Quesadillas are a favorite and we keep it simple. Putting a little cheese and some finely chopped scallions is my favorite filling. A little oil in a skillet heated over a medium flame will perfect for heating up the tortilla. If you want to make a taquitas( little rolled up tortillas of meat or cheese), use a little more oil.
Have a great Cinco de Mayo. Make some tacos this week. Make them next week. They may just become a staple in your house as well. Delicioso.


